A Guide for professionals responsible for facilities and maintenance considering Thermal Imaging.
If you don’t understand how to run an efficient operation, new machinery will just give you new problems of operation and maintenance. The sure way to increase productivity is to better administrate man and machine.
W. Edwards Deming
What would happen if your building and the critical equipment you have in it could talk to you?
What if the building could tell you that it had a hidden leak destroying the foundation hidden behind the walls?
What if your critical power generation system could tell you it’s stressed and on the verge of a breakdown?
That communication would dramatically change the way we get help for the building. It would revolutionize the maintenance process and save more equipment and building costs.
Good news. Your building and equipment have always been talking to us. We just did not know how to listen and understand what these essential assets were saying to us.
Now we do!

A New Communication Model
Just like our immune system tells us there is something wrong with changing temperatures, you get a chill or a fever when there is an infection, so too do buildings and equipment radiate temperature differences when things are awry. And we can read those temperatures with thermal imaging.
For example, we know that leaking air ducts and excessive moisture create colder areas than their surroundings. We also know that any electrical or mechanical systems in buildings show a temperature increase before failing.
We use thermal imaging technology to visualize and measure temperature variations from the norm. In the hands of facilities maintenance crews, thermal imaging analysis leads to early detection, corrective action, and the avoidance of costly maintenance and repair.
The Origins Of Thermal Imaging
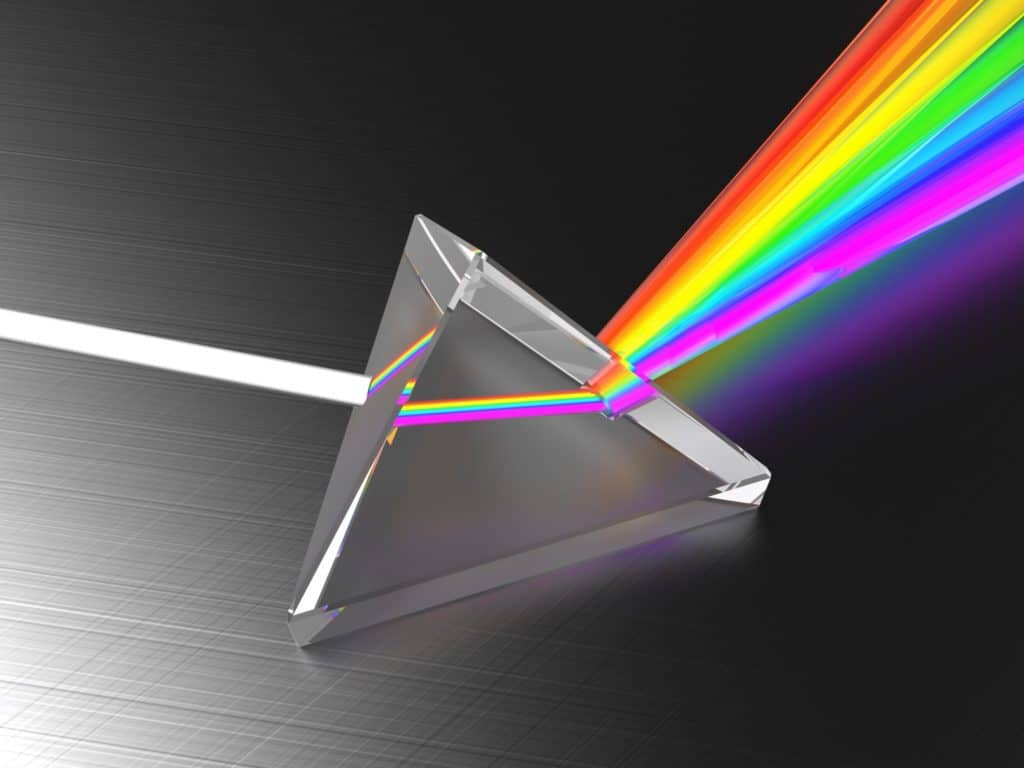
Thermal imaging dates back more than 200 years, when astronomer Sir Frederick William Herschel discovered the existence of infrared (1800).
He was curious about the thermal difference between the various light colors, so he created a simple experiment using a glass prism. With sunlight directed to the prism, Herschel created a light spectrum and measured each color’s temperature. He found that the temperatures varied by color and increased from the violet to the red part of the spectrum.
His curiosity was piqued.
After noticing the color temperature pattern, Herschel measured the temperature beyond the red part of the spectrum in an area without visible sunlight. Imagine his surprise when he found that this area had the highest temperature.
Thus, the principle of measuring temperature based on visible and invisible light color, now called thermal imaging.
Intro To Industrial Thermal Imaging
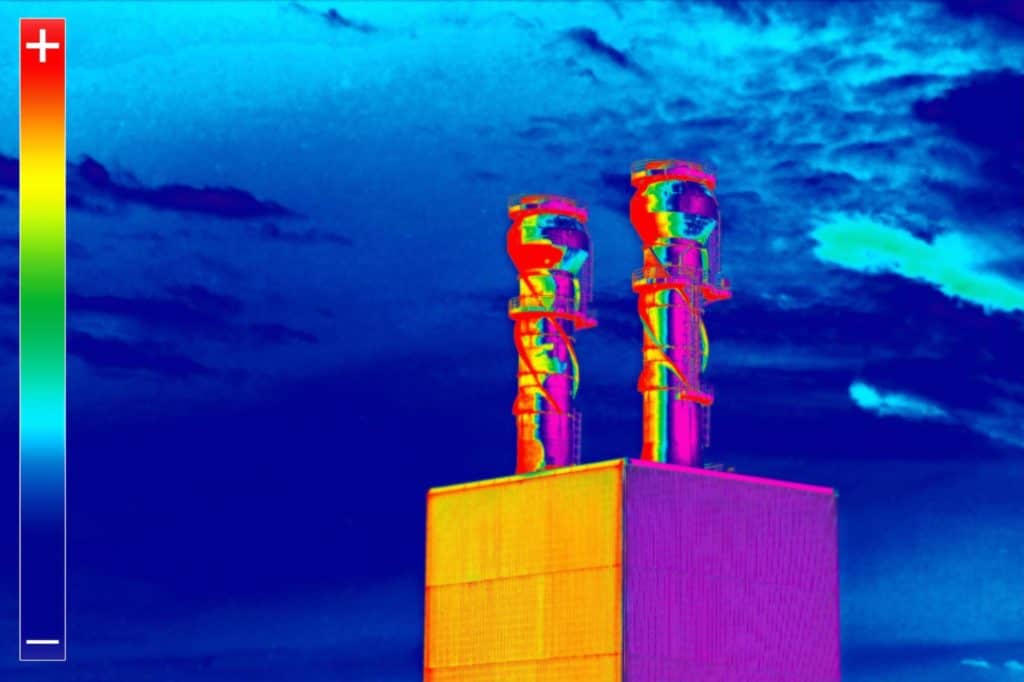
Infrared thermal imaging is a passive technology. That is, the inspected object does not need illumination with a strobe or other external light source. Instead, the sensor measures infrared energy emitted naturally by the subject.
Today, we cannot understand the health of individuals without using a thermometer. It is a vital instrument and ubiquitous in homes, clinics, and hospitals.
We expect Thermal Imaging to become a regular part of the building and equipment health diagnosis toolkit.
The simple reality is that infrared thermal imaging has become an essential tool for facilities and equipment maintenance, HSE (Health, safety, and environment), and quality assurance personnel at commercial and industrial facilities.
It’s no longer a question of if you need thermal imaging for these disciplines. It’s more a question of how often and when you need to conduct a thermal imaging survey.
The simple reality is that the longer your system faults go undetected, the more severe and costly they are to repair.
A thermal camera or thermal imager is a robust, non-contact tool for monitoring and diagnosing the condition of a building envelope and its electrical systems, HVAC, and plumbing. These thermal imaging cameras help your management teams identify problems earlier rather than later, document the issues immediately, and prioritize your efforts based on criticality.
With medicine, we are comforted in the knowledge that “prevention is better than the cure.” So, too, in the building management discipline. With Thermal Imaging, the prevention (diagnostic) costs are far lower than the cure (late catastrophic failure).
The benefits of thermal imaging extend beyond diagnostics and early prevention. Additionally, your thermal imaging scan is a non-destructive method to pinpoint energy losses in a building. Pair a thermal imaging camera with a ‘Blower Door’ system used in building energy audits, and you can speed up inspections dramatically.
The same is valid for surfaces. The thermal imaging camera is an incredibly reliable method for scanning and visualizing temperature variations on entire surfaces accurately and quickly.
Thermography inspection programs are contributing to substantial cost savings around the world.
Your thermography inspection program will save you money, too!
Infrared Thermography is the art of transforming an infrared image into an image with temperature measurements. This particular type of image is called a radiometric one, which allows temperature value measurement from the image. Every pixel in the radiometric image converts into a temperature measurement via complex algorithms incorporated in the camera’s software. A properly calibrated IR camera can provide accurate non-contact temperature measurements of the objects it records.
IR (infrared radiation) behaves just like visible light. Just like how we manipulate light using cameras, you focus IR using a lens, and, more importantly, you detect IR by electronic sensors. Thermal imaging systems are primarily digital cameras tuned to respond to infrared radiation rather than visible light.
Manufacturers use IR cameras to boost preventive maintenance effectiveness and find defects in their assembly processes.
As a parent, you know that it is a sure sign of infection when your child has a fever. Similarly, industrial engineers and operators know that a temperature spike in a roller bearing is a sure sign that it’s about to fail.
Thermal imaging cameras used in facility inspection:
- They are similar to a consumer video recorder or a digital camera and just as easy to use.
- Deliver a comprehensive overview of the situation.
- Provide a detailed view of the situation.
- Identify and isolate problems.
- Measure temperatures and temperature differences.
- Document the findings and store that information.
- Clarify what needs repair.
- Highlight small issues before they grow into more significant challenges.
- Saves valuable time and money.
A typical facility has hundreds of points on the ceiling, floor, walls, and even roof that provide information about building health. Traditionally, one would survey an HVAC system with an IR thermometer or a contact-measurement tool. That method is incredibly time-consuming and just like walking around blindfolded: you can only find trouble spots through trial and error. The risk of the inspector missing a small fault that’s affecting the entire system is very high.
Using a thermal imaging camera, an operator quickly locates and traces the source of water leaks from an AC system. You see, the evaporations from leaks have a cooling effect on floors, wet ceilings, and walls, and the Air Conditioning condensate leak appears colder than the rest of the room. Visually, you see a thermal trail of temperature differences.
What about misaligned ductwork?
Easy work for a thermal imaging inspection.
Depending on your thermal imager’s color settings, when warm air is escaping from the fittings, it appears bright and yellow, while the cooler air around it seems muted as black and purple. A leaky duct won’t just warm the rooms below it. The leaks from the pipe also heat the attic. The visible color anomalies from a thermal imaging inspection let the operator see where you are wasting money.
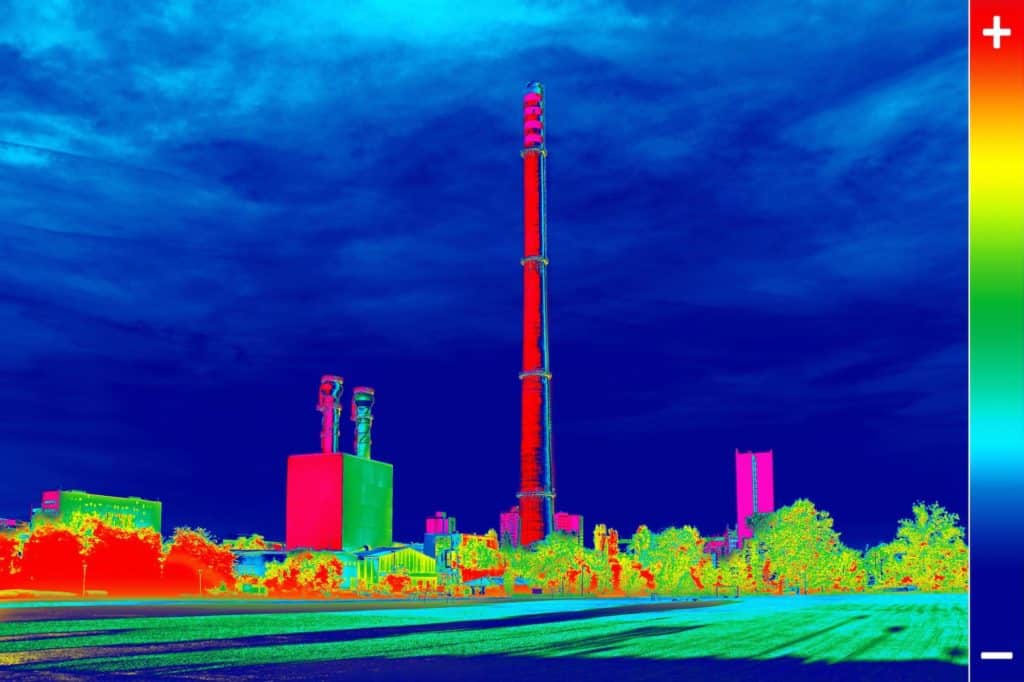
Thermal imaging also applies to your operating equipment.
A quick inspection of operating equipment with a thermal imaging scan tells you more than you knew about the health of those systems. In general, operating equipment tends to heat up as they begin to fail. Use a thermal inspection to find stressed motors or worn belts, to check overloaded electric circuits, and to see if there is overheating anywhere in the system. Potential electrical shorts show up as hot circuits or hot fuses. An air handling system with a clogged filter shows up hotter than usual.
Electrical and plumbing inspections with a thermal imaging camera can help you:
- Locate hot or loose connections
- Find overloaded circuits, motors, and wires
- Trace water leaks to their source
- Determine the size of the moisture buildup
- Monitor drying and verify cleanup
A building inspection with a thermal imaging camera can help:
- Visualize cracks that cause energy loss
- Detect missing, defective, or even wet insulation
- Find moisture trapped in insulation, walls, and roofs.
- Locate thermal bridges
- Find disruptions in district heating supply lines.
- Locate water infiltration in flat roofs
- Detect construction failures
Thermal imaging cameras are versatile, affordable tools that can help you ensure the safety of your facility and the people who work there.
Industrial Thermal Imaging
What is Infrared Thermography?
Infrared Thermography is, in simple terms, the process of using a thermal imager to detect radiation (heat) emanating from an object, converting it to temperature measurement, and visualizing the object along with the temperature distribution. The images of detected temperature distribution are called thermograms and are used to see the heat production on objects that would otherwise be invisible to the naked eye.
So, Infrared Thermography starts with the collection of an infrared image. It then converts the image into a radiometric one, allowing technicians to generate temperature value readings from the image.
The camera essentially converts every pixel in the radiometric image into a temperature measurement. It does so by using sophisticated algorithms in the camera’s software. Thus, a calibrated IR thermal imaging camera provides accurate temperature measurements of the objects it records without actually having to touch them.
What is Thermal Analysis as it relates to buildings and equipment?
Thermal analysis is a nonintrusive method of using temperature and thermal characteristics or thermal patterns of plant equipment and structures to detect anomalies or inefficiencies.
The thermal analysis intends to detect abnormal thermal conditions or changes in temperature that may indicate problems in their nascent stages.
Different technologies can be used in thermal analysis to detect dynamic changes in heating; however, using thermal imaging cameras is among the most effective.
What is Thermal Inspection?
The preventative maintenance discipline is analytically rooted in the principle that early detection means more effective maintenance planning and managed downtime than unplanned outages.
A thermal inspection using thermal analysis is like giving superpowers to a facility or operations maintenance team. They can see previously invisible problems.
A Thermal Inspection is also known as a “scan” or “survey.” This Thermal Scan takes place with equipment in service and working under load; thus, you avoid disrupting production, and outages are not needed to conduct the inspection.
Imagine running a mission-critical production or power facility on which others depend.
In cases where service continuity is paramount, infrared thermal inspection advantages over other methods are insurmountable.
What do experienced players tell us about the use of Thermal Inspections?
National Fire Protection Association (NFPA) Standard 70B, Recommended Practice for Electrical Equipment Maintenance, lists suggested practices. NFPA 70B, section 11.17.5 states:
“Routine infrared inspections of energized electrical systems should be performed annually. . . More frequent inspections, for example, quarterly or semiannually, should be performed where warranted by loss experience, installation of new equipment, or changes in environmental, operational, or load conditions.”
Facilities Instructions, Standards, and Techniques Volume 4-13.
NFPA 70B also recommends performing an inspection using instruments that use a scanning technique to produce an image of the inspected equipment, a capability inherent in every proper thermal inspection.
The US Government Department of Interior, Bureau of Reclamation, runs some of the most extensive, most complex facilities where continuity is essential. They are responsible for many dams in the United States, and you may know them as the hydropower or the water guys. They have publicly acknowledged that thermal inspections have improved their effectiveness in identifying and solving problems and reducing outages.
While the Facilities Instructions, Standards, and Techniques (FIST) of the Bureau of Reclamation discuss other equipment used to perform thermal analysis of equipment, it should be noted they conclude that Thermal Imaging is the most effective. They note that:
“Other technologies used to perform thermal inspections often yield less reliable results and only should be used when the use of thermal imaging equipment is not feasible, typically due to safety issues.”
In the words of the Reclamation:
“IR thermography returns approximately $4 in savings to every $1 spent on IR thermography. Savings result from:
- Avoiding forced outages resulting in revenue loss.
- Reducing severe damage caused by equipment failing catastrophically.
- Reducing costly, time-based preventive maintenance by predictive analysis of equipment condition”
In simple terms, infrared thermal inspections allow maintenance teams to see moisture intrusion, missing insulation, heat loss, stressed equipment, even a roof leak, and a host of other typically invisible facility problems in real time.
There is no doubt that Thermal Inspections based on Thermal analysis and explicitly using IR thermography is a very successful method for improving maintenance effectiveness and reducing maintenance costs in many industries.
A Thermal Inspection will do the same for you in your business.
The Technological Shift in Thermal Imaging Needed
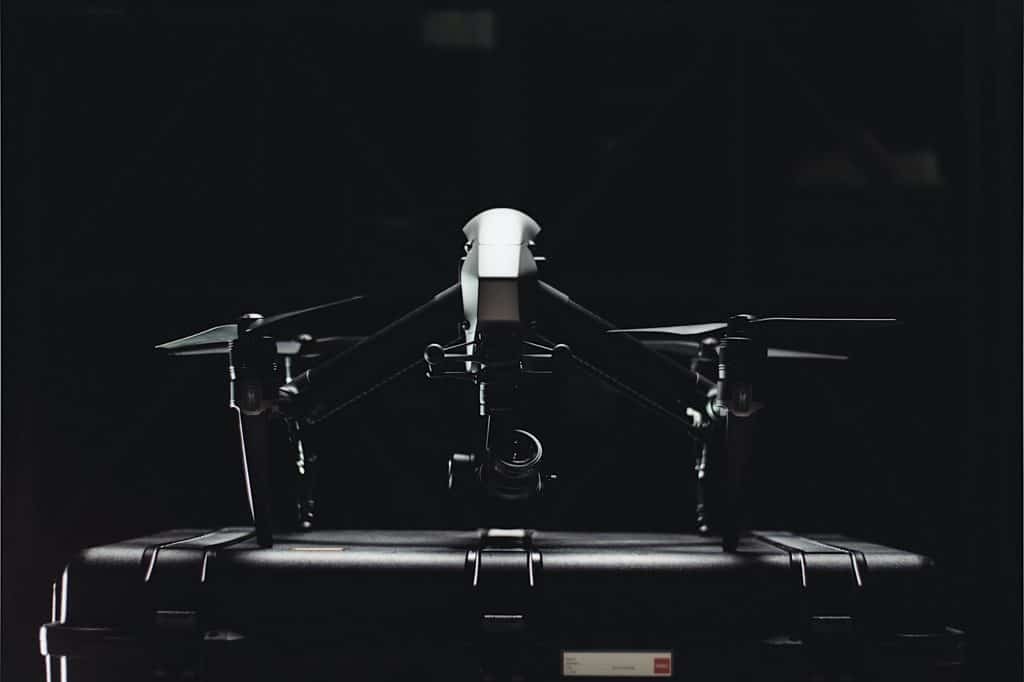
Mounting an Infrared Thermal Imaging camera to an unmanned aerial vehicle (UAV) may have the most potential to make Infrared technology the inspection system of choice.
Essentially, this approach allows surveyors to fly a thermal drone (IR enabled) overhead of and throughout a facility to get a bird’s-eye view of the operation or facility. You can get views and measures of your equipment or facility that you may not have seen before, or you may have only measured infrequently due to the difficulty in accessing those viewpoints.
There are numerous ways IR inspection by unmanned aerial vehicle (UAV) is complementary to even the best foot infrared scans, surveys, or inspections. First, Unmanned Aerial Systems (UAS) offer an increased vertical resolution that would otherwise be impossible or too expensive to obtain due to the need for specialized rental equipment. Having higher vertical resolution ensures you have a more comprehensive view of how your entire facility is operating.
Don’t forget surveyor safety – UAVs improve on this, too. Just as conventional thermal imager shortens the list of “difficult to monitor” (DTM) and “unable to monitor” (UTM) zones, drone-based thermal imagers make this list shorter yet – and that means less danger for workers than even the best first-generation IR solution.
Yet the real attraction to drone-based infrared monitoring – the thing that’ll get nearly every facility onboard – is how often you can do screenings. Because drone-based monitoring is so fast, it offers the option to have far more frequent tests – even weekly, if required. Remember that critical equipment can start showing stress at any point. If screenings detect them within a few days of starting, that results in a far more proactive response and an earlier return to higher efficiencies.
True, running thermal imaging UAVs does require a skilled drone pilot to manage the equipment in a safe manner, which could raise operational costs slightly at first. But even after considering the initial equipment investment and operator budget lines, researchers have estimated that these costs are recouped quickly by making it far easier to find and repair previously unseen problems.
So, while infrared inspections on foot are great, aerial inspections using infrared-detecting UAVs are much better because they’re making it easier and cheaper than ever for even smaller companies to use sophisticated preventive maintenance solutions.
Viper Drones IR infrastructure inspection solutions and drone inspection service lead the drone services industry. It combines the infrared detection advantages of the most accurate and capable thermography technology with a professional flight platform chosen explicitly for thermal imaging missions.
It is safe, reliable, and simple to integrate into your asset inspection procedures or preventive maintenance program. It has high-end FLIR thermal sensors that can be calibrated precisely to look for specific temperatures, palettes, and emissions profiles. With this kind of equipment, all of a sudden, it becomes possible for operators of all sizes to purchase and manage their own IR drones so that it’s even realistic to conduct weekly inspections. However, especially when the overhead perspective is only needed infrequently, and given the regulatory uncertainty and challenges around managing a commercial drone inspection program, we recommend, in those cases, partnering with commercial drone service companies with industrial inspection domain experience.
Whether an operator needs more frequent testing, requires higher resolution, or is just looking for a cost-effective way to achieve greater efficiencies, industrial inspection drone services or drone-deployed IR solutions are likely the preferred solution.

Get The Benefits Of Thermal Inspection In Your Business
The well-experienced users of prevention maintenance disciplines and early adopters of thermal analysis and Infrared thermal inspections have shared many of their experiences publicly. We have relied heavily on the records available and our expertise in providing the following best practice guidelines for incorporating thermal inspection as part of your management process:
- Initiate a Thermal Analysis Process for your business
- Define your goals and expectations
- Decide whether to contract or do it yourself
- Ensure the minimum documentation required
- Incorporate into your preventive maintenance program
- Train and certify your internal and external resources
1. Initiate a Thermal Analysis Process for your business
Establish a standard policy for Thermal Analysis of all your facilities. Include optional variations allowing tailored practices that vary by the risk and nature of the facility.
Each local facility should adopt and tailor the global policy for local implementation.
2. Define your Goals and Expectations
Integrate Thermal analysis as a critical element of the overall maintenance program.
Use it as a supplement, not as a replacement for visual inspection.
For each facility, define the role of thermal analysis inspection. Is it a scan, a survey, an overview, or a detailed inspection.
Remember that there are situations where thermal imaging cameras are not adequate on their own to analyze the entire system. In these cases, implement other supplementary technologies to document the temperature variations on the specific equipment or area.
An effective thermal analysis inspection process uses various state-of-the-art thermographic imaging equipment, from drone-enabled to hand-held, including contactless thermometers, heat dots, heat tape one-time applications, or thermal paint.
Each technology selected has benefits and limitations. Ensure you have defined the scope of use for each technology, defining criteria for applicability and the associated practices around monitoring that application.
Create an internal process to collect and evaluate thermal measurement data, make maintenance decisions based on the analysis, and document and learn from the results.
Thermal analysis is a suitable predictive maintenance tool as well as a tool to augment any enterprise preventive maintenance (PM) practices. We recommend the following steps:
- Conduct qualitative inspections to identify problems.
- When you find a problem, create a follow-up action for a more in-depth thermal examination. Include a quantitative inspection using thermal imagers to quantify the magnitude of the problem.
- Apply your severity criteria to establish the appropriate corrective action.
- Follow up after the corrective action with a qualitative inspection to validate the problem resolution.
3. Decide whether To Contract or Do It Yourself
We recognize that one of the critical decisions every facility or operational owner faces is the question of what to do inside versus outside.
Choices include doing it all in-house, doing it all with contract partners, or a combination based on analyzing your specific operating characteristics.
In making the decision, you must understand and evaluate the breadth of thermal analysis inspection techniques, their respective value, and requirements for implementation.
Operating characteristics that lean towards specific approaches require evaluation of the following:
- How critical is the equipment or facility to the enterprise’s mission or location?
- What are the potential benefits associated with maintenance savings from incorporating thermal inspections into an enhanced PM practice?
- What latencies and cost trade-offs are impacted by the approach selected?
Prioritize a minimum level of accuracy and consistency when weighing the economics and effectiveness of your implementation choices.
We recommend explicitly identifying which parts of the process to conduct with internal resources and which are better delivered using external contract partners.
This sourcing decision is a critical point in the development of your thermal analysis strategy and implementation, as all subsequent thermal analysis activities are affected by the ultimate choice.
Even when developing a complete thermal analysis and inspection process in-house, one may consider renting or leasing state-of-the-art thermographic systems for quantitative analysis, which can be expensive.
Thermographic inspection and analysis is an evolving technology landscape with new products and techniques emerging rapidly. Regardless of your chosen approach for implementing thermal checks, we recommend ongoing education and advisory relationships, which keep you updated.
4. Ensure The minimum documentation required
Document your local thermal analysis process for clarity and continuity. At a minimum, your documentation should include:
- The specific goals of your thermal analysis and inspection process.
- Responsible employees, external resources, and their roles.
- Training strategies.
- A detailed listing of Plant equipment to be inspected.
- Thermal analysis equipment minimum acceptable specifications.
- Equipment calibration requirements and records.
- Critical Inspection tools and processes. Ensure there is consistency in analysis and reporting.
- Any specific Inspection or Analysis guidance.
- Safety considerations, including the requirements for any job hazard analysis.
- Recordkeeping practices.
5. Incorporate into your Preventive Maintenance Program
For maximum benefit, tightly integrate thermal analysis inspections into the local PM program.
After identifying the specific plant equipment or areas of the facility where thermal analysis is beneficial, create a separate PM and job plan for the thermal analysis.
In the thermal analysis job plan, identify which devices and methods you use for thermal measurements. If there are site-specific issues, such as locating the camera or the best angle of use, annotate those in the job plan details.
The thermal analysis PM and job plan should identify any allowed adjustments to the job plan and PM frequency required.
We recommend incorporating thermal analysis inspections, such as annual drone-enabled thermal scans, throughout the facility under one PM. The periodic approach is more effective than performing thermal analysis inspections on equipment piecemeal for PM purposes.
Recordkeeping is an integral part of the PM program and must include the details required for that process at a minimum. To optimize the benefits of thermal analysis, you should extend recordkeeping to include details specific to the thermal inspection process since comparison to past inspections is essential and valuable.
We encourage developing a benchmarking procedure along with practices for documenting subsequent inspections.
Benchmarking should include:
- Equipment to be inspected.
- Loading equipment when checked. Ideally, perform the benchmark when the equipment is carrying a full load.
- Location of thermal analysis instrumentation relative to the target equipment. Frequently, there is the best spot or angle for setting the instrumentation to monitor the equipment. Document if multiple locations, angles, or distances are thermally analyzed or identify the best position for scanning and surveying in the benchmark records.
- Specific Thermal measurement inspection equipment used.
- There are differences between cameras, lens angle, long-wave infrared (LWIR) or mid-wave infrared (MWIR), and any other relevant metrics.
- If you used hand-held radiation thermometers to collect data, then identify their Make, model, and emissivity value.
- If you use tapes and paints to determine temperatures, record the manufacturer and expiration date, and keep copies of the material safety data sheet (MSDS).
- Include thermographic images and visible photographs when possible.
- Try to collect a digital record of the component measurement when possible. If it’s not available, then keep written and compiled records.
- Whenever possible, record measurement conditions such as the distance from the target, any abnormal conditions at the facility, or other salient observations.
- Equipment temperature. Whenever possible, we recommend you record and include the equipment temperature in a trending program.
Make your benchmark records available for comparison to all subsequent thermal analysis surveys. When inspectors identify significant temperature variations from the benchmarked temperatures, that variance should trigger further investigation.
6. Train and certify your internal and external resources
Do not expect benefits without the requisite training and certifications, whether using in-house teams or external resources.
Training and certification, of course, depend on the complexity of the selected technologies and the precision required to achieve your goals.
Many cameras are relatively easy to use and require little training to ensure proper qualitative analysis. That said, even when using a hand-held basic radiation thermometer, for example, an IR temperature gun, the distance from and emissivity of the target can significantly affect the accuracy of the measurement. In some ways, there is an argument to be made that the more expensive technologies help ensure consistency and reduce the technical skill required of the operator.
At a minimum, training must include on-the-job training from a skilled operator. We recommend operators become familiar with the camera or other instrument manual and other technical resources and, if possible, attend classroom training.
Remember that qualitative thermal analysis equipment does not require certification, whereas quantitative measurements do.
Favor less complicated systems. The more straightforward to use, the system, the more likely the facility embrace the solution. Frequent use and experience with the technologies and techniques have a direct impact on the use, results, and benefits within the facility.
We recommend requiring a certified operator to perform a quantitative review of problems identified by un-certified operators. The more critical the operation, equipment, or area of the facility, the more valuable the oversight of certified operators. Ensure that you perform a certified operator review before making critical decisions on outages and repair strategies.
Operator certification is essential when the results are for official records, such as those about contract performance. Certification enhances the consistency and credibility of your operator or contract resource.
Get Thermal Imaging Right
For a more detailed discussion on:
- How do you select and maintain Thermal Analysis Hardware and Software?
- What are the essential features in selecting your thermal imager?
- Which Infrared camera brand should you choose?
- What affects your ability to measure temperatures with thermal imaging cameras accurately?
Please read our piece titled: Get Thermal Imaging Right
Conducting Thermal Inspections
Ensuring Safe Thermal Inspections.
Personnel safety is of utmost importance for all operations and maintenance personnel. That’s true for thermal inspection analysis and inspection resources, whether in-house or contracted, also.
Thermal inspections, scans, and surveys typically occur while the equipment or facility operates under load, which is inherently risky. Besides, thermal inspections occur near equipment, which poses additional risks from electrical and mechanical energy and physical hazards.
Thermal inspections are primarily a touchless routine analysis of equipment or components easily accessed. When a more in-depth analysis of equipment behind protective panels is needed, you should consider other thermal analysis techniques, such as heat tape or heat paint. Thermal tapes and paints avoid hazardous exposure to the inspector. Even if they do not provide precise temperature values, the analysis still provides valuable information to determine if additional maintenance is required.
When a thermal inspection includes exposing the thermographer to hazardous energy sources, proceed cautiously and ensure it is conducted with the highest industry-recommended safety standards appropriate to those risks.
Remember that safety concerns in an industrial setting are not exclusive to thermal inspections. Thus, your safety protocol should, at minimum, include any standard plant maintenance safety practices and be supplemented for additional characteristics unique to the thermal inspection technique and process.
Some Typical Safety concerns in an industrial setting include:
- Inspections may occur when protective barriers on electrical equipment are removed, resulting in exposure to arc flash hazards. In those cases, we recommend that thermal inspectors wear all appropriate personal protective equipment (PPE) and comply with facility-specific and industry-standard arc flash protection processes.
- For enhanced safety around safety hazards and to minimize exposure to hazardous energy, we recommend inspectors adopt a “Freeze and Leave” practice, recording measurements, capturing the image, and immediately leaving the area.
- We recommend telephoto lenses to maximize the employee’s separation from potential hazards when possible.
- We also recommend the preceding practices near exposed energized electrical equipment.
- Thermal systems and accessories can be bulky and heavy. Analysts must practice situational awareness and exercise care when climbing or maneuvering tight spaces.
- The thermal inspector role requires attention to the system, the camera, the target, and the image. Experienced analysts are vigilant to ensure their focus does not make them ignore the risks around them.
- In higher-risk situations, we recommend an inspection team and an inspector accompanied by an assistant. The role of the assistant is to focus on protecting the thermographer from hazards specifically.
- We recommend inspectors adopt a “Stop and Look” practice and not be in motion when making a measurement or collecting an image.
- For drone-enabled thermal inspections, there are valuable reductions in some risks due to increased separation between the inspector and the target. However, drones introduce other risks inherent with the use of UAS generally and the use of drones in specific environments. In these situations, we recommend following all risk reduction protocols for thermal imaging and drone inspection services. When there are overlapping standards, we recommend following the more stringent policy.
Selecting Thermal Imaging Inspection and Analysis Equipment
Various methods are available for conducting thermal analysis and inspections at a facility. These include a thermal imaging camera, hand-held radiation thermometers, heat-sensitive stickers, paints, and numerous other combinations.
Benchmark practitioners tell us from their experience that the thermal imaging method delivers the best combination of information and accuracy.
The simple reality is that a picture is better than a thousand words. And one thermal image captures information on thousands of points of thermal measurements.
Inexpensive cameras generally have a thermal sensitivity of less than 0.2 °C, an accuracy of 2 °C., and provide quality information enough to trend.
Most inexpensive hand-held radiation thermometers provide an average temperature of an object, cannot discern the location size of the measurement area, do not allow the user to adjust emissivity, and introduce additional errors in the measurements. Take great care anytime using a hand-held radiation thermometer.
As the imager price increases, so too do the quality of the image and the accuracy of the readings generally.
Infrared Thermal Camera Settings
The thermal inspector should ensure that the following settings on the camera are correct before and during the inspection:
- The Date and time
- Atmospheric temperature (ambient air temperature)
- Relative humidity (use a portable hydrometer or use plant’s hydrometer)
- Distance to target
- Emissivity of target
- The temperature of objects that are reflecting radiation off the target (background temperature)
- Desired temperature range (from optional camera ranges)
- The Focus
Although distance measurement is not as critical for qualitative inspections, most cameras allow you to assign a distance value. Whenever possible, the distance to the target should be approximated or measured and programmed into the camera. The practice of recording the approximate distance enhances the data trended over the equipment’s life.
When quantitative measurements are required, then a more accurate value for distance must be measured. The distance to the object is critical because the camera uses this value to estimate the attenuation of the infrared signal based on environmental conditions.
Like professional photography, camera settings are essential for an accurate inspection. Some aspects cannot be manipulated in the thermogram after capturing the image. Typically, distance to the target, focus, and temperature range are not manipulated in the software. Better to get the settings right and the image right than to be forced to redo an inspection.
Sophisticated thermal imaging software typically allows for ambient temperature, emissivity, relative humidity, and reflected temperature to be manipulated after the fact.
It is always good practice for the thermographer to set values as accurately as possible in the camera before performing an IR inspection. Those adjustments improve consistency and speed up the process of diagnosing problems quickly. An experienced thermographer following these practices can make recommendations immediately following the survey.
However, the system’s ability to adjust parameters after inspection within the thermograms is typically used to improve the quality of the image, analyze data, and create reports. Users may modify parameters to develop similar or reference images that can be trended over time or compared to similar equipment.
What is Spot Size in thermal analysis?
Thermal analysis equipment records the temperature of a “spot” in the image and displays this temperature. The size of the spot is critical because the temperature recorded is the average of the temperatures of the pixels in the spot.
If the spot is too large, then the average smooths out any hot spot pixels, giving a misleading impression that the temperature is higher (or lower) than a smaller spot size would show.
To minimize the smoothing effect, inspectors try to keep the spot size as small as possible. But eventually, you run into practical limits. The spot size is determined in part by the device’s proximity to the target. Sometimes, you must stay further away for safety or because of physical obstructions. In those cases, we recommend using a telephoto lens to reduce the spot size of distant targets.
How does distance affect thermal analysis?
The distance from the target is a critical variable in determining apparent temperatures accurately. The physical distance of the infrared thermal equipment from the target is one parameter that cannot be corrected after the image is recorded. That is why it’s standard practice to measure or estimate distance and enter the value into the camera.
For consistency and to simplify the process, experienced inspection teams mark the floor in front of the equipment with their preferred position.
Why use Reference Photos in thermal imaging?
Experienced thermographers know the value of a reference photo when analyzing thermograms. As a standard practice, they capture a visual reference photo with a standard camera simultaneously and from the same point of view as used in capturing the thermogram.
The reference photo simplifies the identification of components that are not so obvious in the thermogram. Incidentally, hand-held radiation thermometers do not capture visual data, so reference photos and notes are the only way to document the location and temperature data properly.
Environmental impacts on thermal inspection
Weather significantly affects the timing and techniques of infrared inspections. Avoid or reduce the effects of weather, particularly when you want quantitative temperatures.
The wind is essentially forced convective cooling and dramatically affects the thermographic inspection of buildings, roof inspection, and even electrical and mechanical equipment inspection outdoors. Even indoors, wind from air conditioning and ventilation rapidly cools a hot spot, affecting accurate temperature measurements. Eliminate or reduce as many of these indoor factors as possible, especially when conducting quantitative inspections.
There are no currently recognized standard wind correction factors. By experience, a wind speed of less than 15 miles per hour (mph) is probably adequate for qualitative inspection. For quantitative measurements, we recommend wind speeds lower than ten mph and ideally less than five mph.
We recommend the following practices for conducting thermal inspections in wind conditions:
- Use an anemometer to measure prevailing wind speed.
- Perform quantitative inspections in as minimal wind conditions as possible.
- Turn off the ventilation system for indoor inspections, if possible.
- When performing inspections on indoor equipment, do so as soon as possible after removing any covers or doors to minimize natural convection or forced cooling in the building.
- Measure the component temperature downwind of the hot spot, if possible. This approach produces a more accurate result.
Qualitative inspections are relative comparisons and are not as negatively affected by the wind.
If all components in a survey or scan are affected equally by the wind, then the thermal signatures are comparable.
High humidity and smoke reduce the transmittance of infrared energy, which reduces the effectiveness of an inspection. Avoid IR inspections in high humidity or smoky conditions.
Early morning, evening, or nighttime inspections provide more accurate infrared inspection results by minimizing sun or solar effects. If the facility is not operating at full load during your preferred inspection window, that has an opposing effect on the usefulness of the results. A proper inspection requires a balance of all those variables.
Current Loading
When possible, conduct IR inspections with equipment operating at or near full load, both mechanically and electrically. There are no simple load correction factors, which makes it even more critical to measure at full load when performing quantitative inspections.
It is crucial to record the loading as part of the IR inspection, but care should be taken that it is the steady-state load. Wait 45 minutes after a load change before measuring.
Do not perform thermographic surveys at low loads in windy conditions.
Evaluating Results
There are four possible outcomes In evaluating thermal analysis inspections:
- A True positive. That is when a problem can be found, and the problem actually exists.
- A False negative is when the problem is missed, and there is a problem.
- A False Positive occurs when a problem is diagnosed where no problem exists.
- A True Negative is when no problem is located because no problem exists.
Reliable thermal inspection processes and evaluations identify all problems of concern. There should be no errors, as in false negatives, and no false positives, ideally.

Complementary Technology
IR inspection is an essential and valuable tool for preventive and predictive maintenance, but it does have limitations.
Complementary solutions, combined with thermal analysis inspection, enhance findings, making it possible to find the root cause of problems even more effectively and rapidly.
Some complementary technologies to consider include:
- Ultrasonic Solutions: Ultrasonic detection identifies frequencies above the audible (sonic) level. High (ultrasonic) frequencies accompany problems that may cause temperature variations. But ultrasonic solutions are also useful in detecting problems without temperature emitting a high frequency.
- Vibration Analysis: Vibration analysis is a helpful complement in diagnosing mechanical problems.
- Motor Current Analysis: Motor current analysis complements thermal analysis and provides insight into electrical motor problems.

Helpful Operations Hints
Helpful hints
Here is a list of helpful hints for performing a quality thermal imaging inspection, scan, or survey.
- Consider Circuit loading when inspecting electrical equipment. Whenever possible, Perform comparative inspections with a load similar to the last review.
- Prioritize Inspections during the maximum possible loading. Avoid examinations when operating below 40 percent of the rated load of the inspected equipment.
- Delay inspections for 45 minutes following changes in loading to allow for temperature to stabilize, especially when reading temperatures indirectly.
- Use a front-surface mirror (i.e., one with the reflective surface on the front surface of the Glass) to inspect the backside of a component. Do not use everyday mirrors due to their internal reflections.
- It is a useful practice to compare one phase of a circuit to the other phases because
- their emissivities are similar,
- the heat generation and dissipation effects should be similar,
- all phases are an equivalent distance from the IR temperature device, and
- all phases are likely loaded equally.
- Unbalanced loads may be a normal operating condition and account for some temperature differences between conductors.
- Inspect Surge arresters and bushings at night to reduce daylight reflection errors.
- It is common for large vertical motors to show several vertical hot “stripes” on the casing side.
- Horizontal motors show characteristic hot spots in the middle of the casing in an even pattern.
- Remember, the heating patterns on an enclosure are likely the result of indirect heating. The actual heat source is hotter than the temperatures recorded on the enclosure surface.
- On an enclosure surface, the heat might result from a heater, resistor, or transformer attached to the other side rather than a critical component.
- Paint on mechanical components affects their emissivity.
- Remember that merely removing a protective covering or even opening an enclosure door affects temperatures, giving a reading not typical of normal operating conditions.

Checklist:
Keep the following checklist with the camera and complete the necessary steps:
- Conduct a job hazard analysis before each inspection.
- Assemble and check your thermal analysis equipment.
- Inspect and wear any personal protective equipment, if required.
- Check that you have all the necessary accessories (batteries, lenses, storage media, tripods) with your camera and that they are working and adequately charged.
- If your thermal analysis equipment does not have imaging capability, consider including an additional digital camera.
- Compile and review previous scans or survey results.
- Compile reference material.
- Follow appropriate safety procedures.
- If a quantitative measurement is required, check that the thermal analysis instrumentation calibration is current.
- Adjust the settings of your thermal analysis instrument as needed.
- Verify and Set the correct distance to the target.
- Set the correct emittance value.
- Set the proper background energy levels.
- Focus the camera.
- Set the temperature range in the camera.
- Record the environmental factors, including relative humidity and wind speed.
- Verify that the instantaneous field of view measurement (IFOV) of the instrument or spot size on a hand-held radiation thermometer is smaller than the target.
- Aim the instrument perpendicular to the target surface to reduce errors.
- Check for and reduce thermal reflections from other point sources near the target surface.
- Keep as far away as possible, and secure instruments from very hot objects and energized equipment.
- Maintain accurate records and trend data.
FAQs
Science Of IR Thermography
Please go to the attached link for a more in-depth explanation of the underlying Science of IR Thermography.

Resources And References
- Academy of Infrared Training
- Infrared Training Center
- IR Information for the Real World
- Infraspection Institute
- Reliabilityweb
- FLIR
- SUAS Toolkit
A Word About Drone Inspection Services
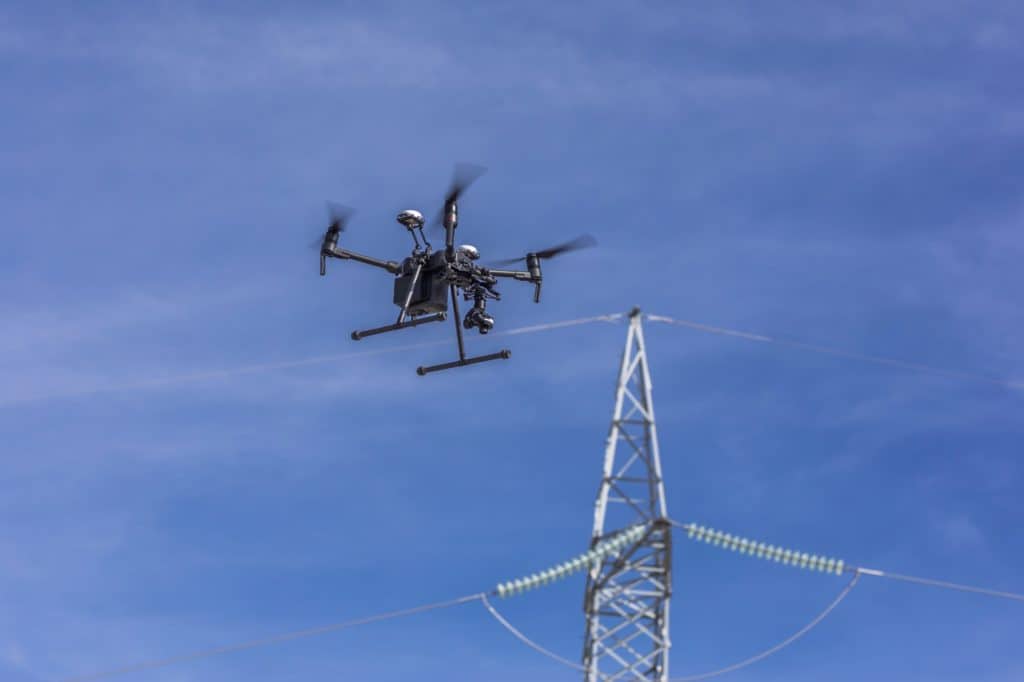
You can’t just buy unmanned aerial vehicles (UAV), hire a pilot and operators, and suddenly be able to conduct inspection services.
Whether it’s a construction job site, cell towers, commercial properties, solar farms, storage tanks, or wind farms, all industrial inspection services are conducted in challenging environments. It does not matter whether we are collecting data for asset management, maintenance, or structural integrity inspections, Safety is of paramount importance in conduct on the job site. As a safety-conscious service provider, we start every project with a detailed scope and risk assessment to understand what exactly our service teams will inspect.
All our inspection services are conducted with a finely-tuned professional industrial drone equipped with highly accurate specialized sensors, such as the thermal imaging sensors from FLIR. Confined spaces inspections require specially designed unmanned aerial systems (UAS). The inspection applications and inspection processes are tailored for the specific industry, industrial setting, and client project requirements.
Before we conduct any drone flight our equipment and technology go through several safety checks. And, we conduct a visual inspection of the job site and surroundings before takeoff. Every piece of drone data including aerial images is secured as a valuable asset.
Bottom line – a UAS program for drone inspection will reduce costs, increase safety, and deliver data faster to your company. But in order for that drone program to be sustainable and consistent, you will need solutions (applications, processes, technology) and partners with industrial inspection domain expertise.

What Should You Do Now?
Talk to your maintenance team, your HSE team, your engineering team, your drone team. Find out what your approach has been to Thermal Imaging, Thermal Analysis and Inspections.
If you are starting out and don’t have a Thermal Analysis program. Contact us. We will evaluate your mission opportunities to determine how much an optimized program could contribute to your bottom line.
We will evaluate your thermal analysis opportunities to determine how much an optimized program could contribute to your bottom line, and help you implement it.
If you have an in-house Thermal analysis team, and they are in need of some targeted solutions, contact us. We will show your team how to cost-effectively leverage the new methods and technologies to quickly get your solution in place.
We will show your team how to cost-effectively leverage the new methods and technologies to quickly get your solution in place.
If you have outsourced your thermal analysis and inspection services, and your provider does not have an enterprise view on reaching your needs, contact us. We will show you or your outsource partner how to move forward most effectively.
We will show you or your outsource partner how to move forward most effectively.

Leon Shivamber
Partner
Advisor, Entrepreneur, Strategist, & Transformation Agent

Brad Nichols
Partner
30 plus years focused on mission-critical technology and operations
